How to capture site photos in YakProject
Photos settle arguments about what was done and when. Capture saves them to the job with a caption and the area they were taken in, and keeps them on the phone until there's signal to upload.
Before you start
- A member of the job
Preview voice Narrated with a local preview voice; the final recording replaces it.
Transcript
Add a site photo to the job, labelled with what it shows and where.
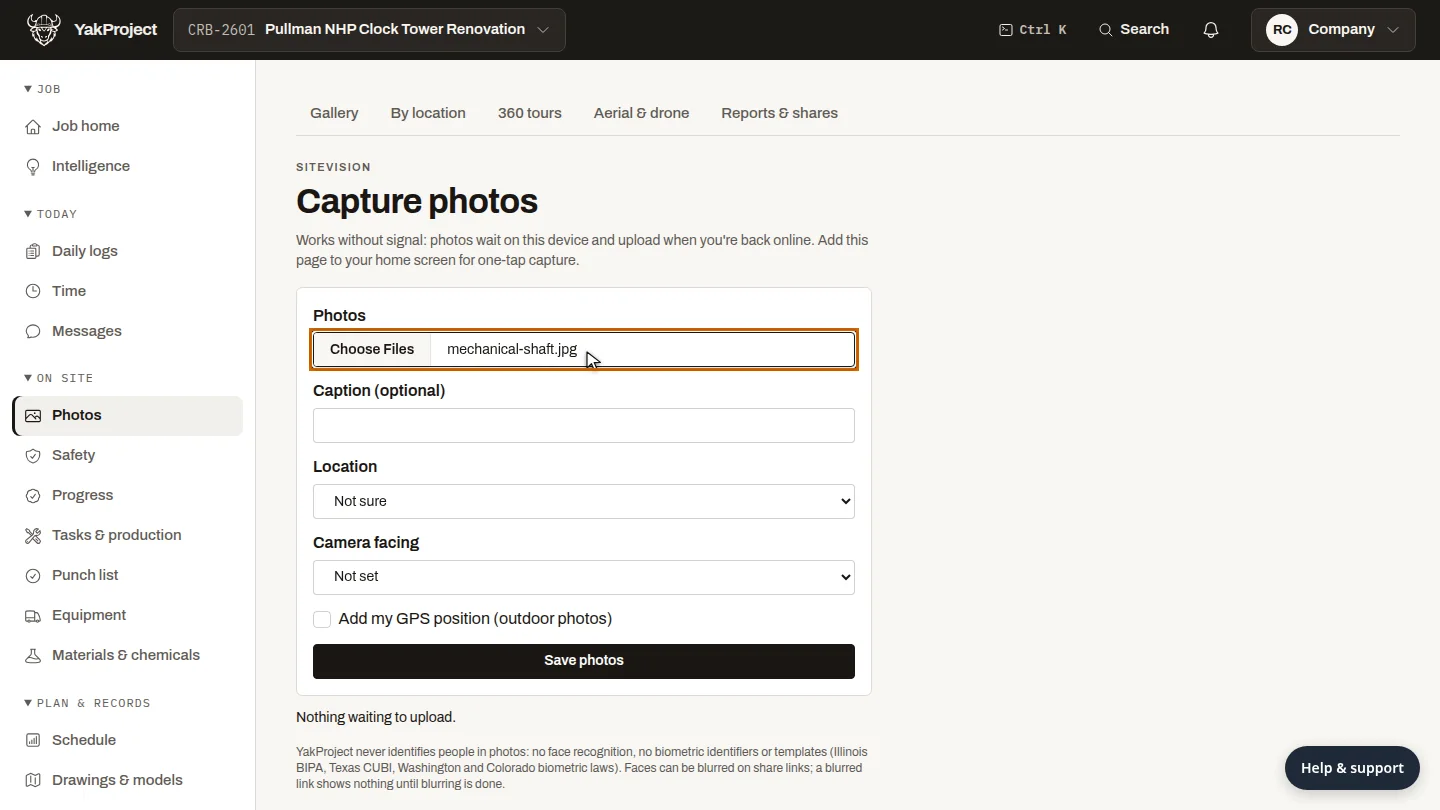
On Capture photos, choose Photos and pick the picture. On a phone this opens the camera, and photos wait on the device until there's signal to upload.
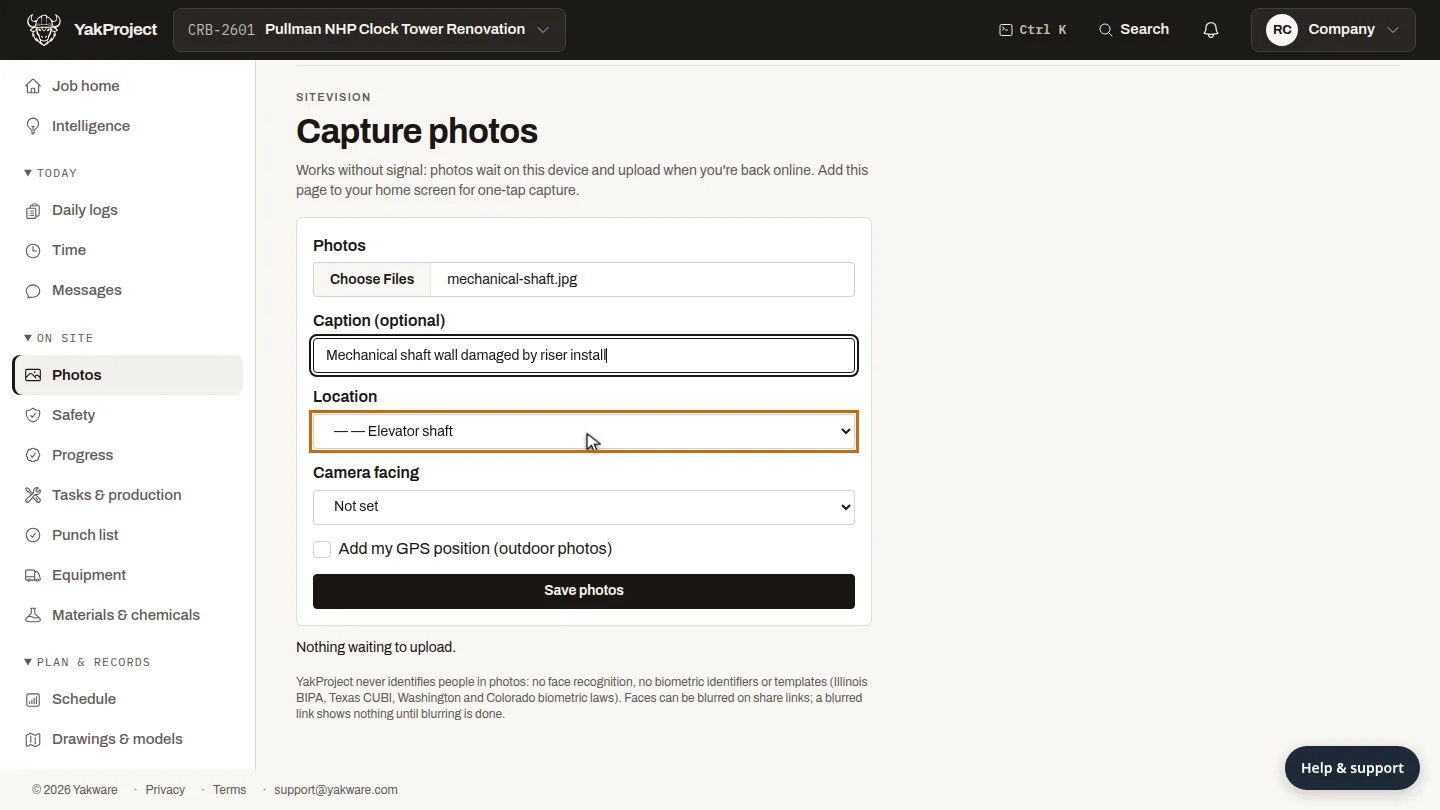
Add a caption that says what the photo shows, and choose the area it was taken in, so anyone can find it later by location.
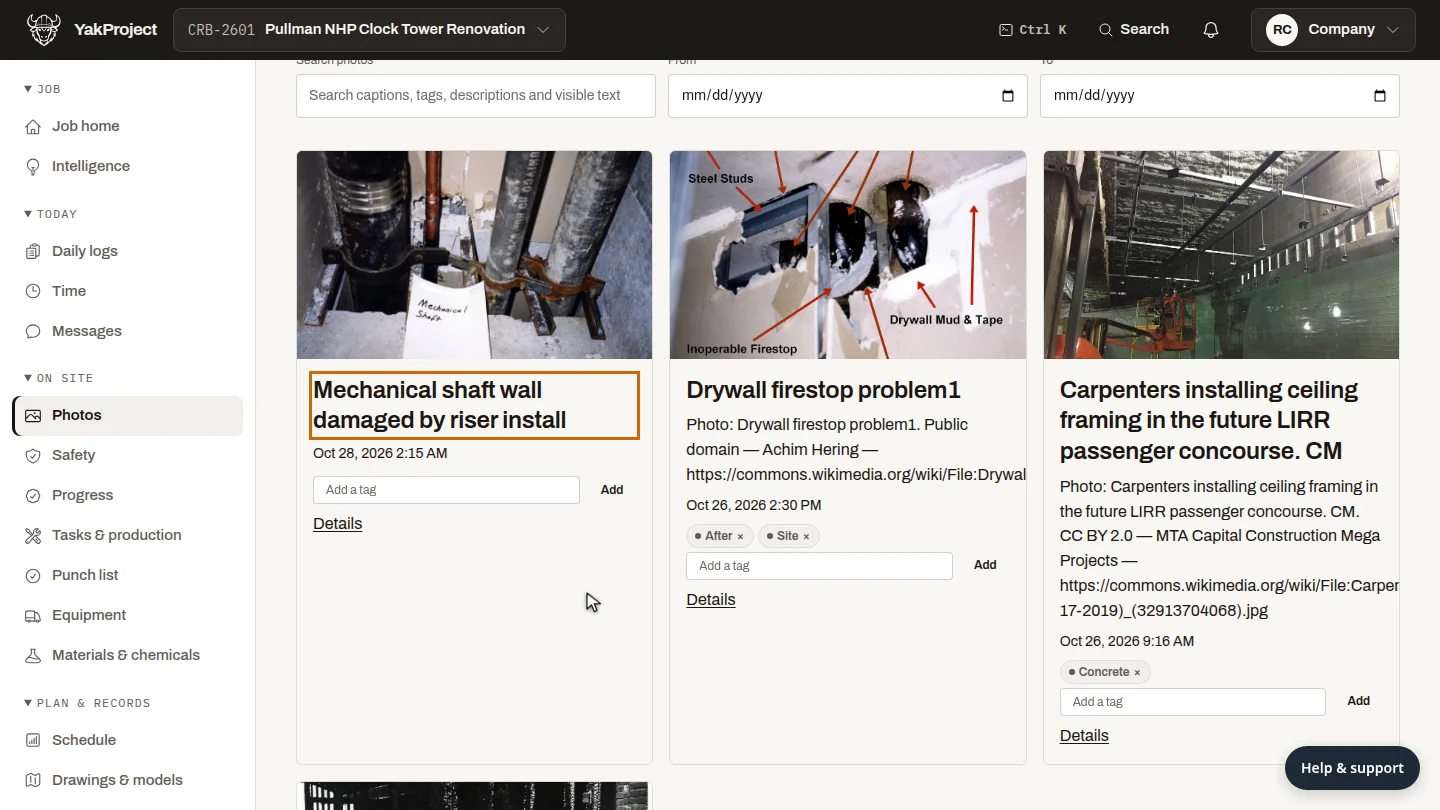
Select Save photos. The photo uploads, and it appears in the job's photo gallery with its caption and the time it was taken.
Steps
Choose the photo ▶ 0:06
On Capture photos, select Photos and choose the picture.
Caption it and set the area ▶ 0:17
Enter a Caption (optional) and choose the Location.
Save and check the gallery ▶ 0:26
Select Save photos. The photo uploads and appears in Photos.
Next steps
Updated 2026-10-26
upload photos jobsite photos progress photos photo documentation